Divergence Table
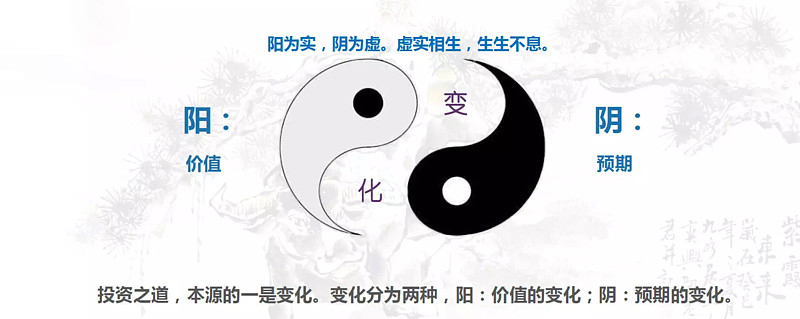
结合自己的指标,分定阴阳和信号指标,信号指标有阿拉丁,三角信号,阴阳可以分裂成,阴阳,阴阴,阳阳,阳阴
结合自己的指标,分定阴阳和信号指标,信号指标有阿拉丁,三角信号,阴阳可以分裂成,阴阳,阴阴,阳阳,阳阴

这篇文章将会收集自己的内在一些想法,我自己认真正达三摩地是了解了自己内在的矛盾,分裂,麻痹,欲望,害怕,迷信,依赖,暴力。
为了达到三摩地这一状态,也许本身就是和现实分裂,因为现实和自己期待的有落差。所想的是哪里,而现在是这里。
竞争就会导致焦虑,竞争好像一个闭环我们都是在打转,一个模式的重复运作罢了。 :depress
To locate the table where your TV show data is stored in PostgreSQL, follow these steps:
Access the PostgreSQL Prompt:
docker exec -it riven-db psql -U postgres
Connect to Your Database:
\c riven
List All Tables:
Run the following command to view all tables in the current database:
\dt
This will display a list of tables along with their schema, name, type, and owner.
Once you have a list of tables, examine the structure of each to find the relevant columns for your TV show data.
Describe a Table:
For example, to see the structure of the tvshows table:
\d tvshows
This command shows you the columns, their types, and any constraints (like primary keys).
When describing a table, look for columns that might contain your TV show data. Common names include:
titlenameshow_namedescriptiongenreHere’s how the entire process might look:
# Access the PostgreSQL prompt
docker exec -it riven-db psql -U postgres

# Connect to your database
\c riven

# List all tables
\dt

# Describe the 'tvshows' table to see its structure
\d tvshows
By following these steps, you can identify which table holds your TV show data and what columns are available for querying or deleting. If you find a table that seems relevant but you’re unsure, feel free to share its structure, and I can help you interpret it!
If you encounter issues with the command you entered, here’s how to resolve them:
Make sure you are in the PostgreSQL command prompt (psql). A prompt like riven=# indicates you’re in the right place.
Try running the query again:
SELECT _id FROM "MediaItem" WHERE title ILIKE '%Isekai%';
If the command executes successfully, it should return the _id of any media items that match the title. If there are no results, it will simply return an empty set.
_id = 3944 🔗You’ve successfully retrieved a list of tables referencing the MediaItem table. Here’s a summary:
| Table Name | Column Name |
|---|---|
| Movie | _id |
| Show | _id |
| StreamBlacklistRelation | media_item_id |
| StreamRelation | parent_id |
| Subtitle | parent_id |
| Season | _id |
| Episode | _id |
_id = 3944 🔍Run SELECT queries on each of these tables:
Movie:
SELECT * FROM "Movie" WHERE _id = 3944;
Show:
SELECT * FROM "Show" WHERE _id = 3944;
StreamBlacklistRelation:
SELECT * FROM "StreamBlacklistRelation" WHERE media_item_id = 3944;
StreamRelation:
SELECT * FROM "StreamRelation" WHERE parent_id = 3944;
Subtitle:
SELECT * FROM "Subtitle" WHERE parent_id = 3944;
Season:
SELECT * FROM "Season" WHERE _id = 3944;
Episode:
SELECT * FROM "Episode" WHERE _id = 3944;
Run these queries one by one in your PostgreSQL prompt to check for any records associated with _id = 3944.
MediaItem having _id = 3944.If you need to delete entries, follow these steps:
First, identify which seasons reference this show:
SELECT * FROM "Season" WHERE parent_id = 3944;
Once identified, delete those records:
DELETE FROM "Season" WHERE parent_id = 3944;
After deleting related seasons, you can delete the show itself:
DELETE FROM "Show" WHERE _id = 3944;
Check for Related Seasons:
SELECT * FROM "Season" WHERE parent_id = 3944;
Delete Related Seasons (if found):
DELETE FROM "Season" WHERE parent_id = 3944;
Delete the Show:
DELETE FROM "Show" WHERE _id = 3944;
Season table to ON DELETE CASCADE for future deletions.Here’s a more compact version for easy copy and paste:
docker exec -it riven-db psql -U postgres
SELECT _id FROM "MediaItem" WHERE title ILIKE '%Ganbare Doukichan%';
SELECT * FROM "MediaItem" WHERE title ILIKE '%The Lord of the Rings: The Rings of Power%';
\d "Episode"
_id = 1314SELECT * FROM "Movie" WHERE _id = 1314;
SELECT * FROM "StreamBlacklistRelation" WHERE media_item_id = 1314;
SELECT * FROM "StreamRelation" WHERE parent_id = 1314;
SELECT * FROM "Subtitle" WHERE parent_id = 1314;
SELECT * FROM "Show" WHERE _id = 1314;
SELECT * FROM "Season" WHERE parent_id = 1314;
SELECT * FROM "Season" WHERE _id = 1314;
SELECT * FROM "Episode" WHERE parent_id = 1314;
DELETE FROM "Episode" WHERE parent_id IN (SELECT _id FROM "Season" WHERE parent_id = 4156);
DELETE FROM "Season" WHERE parent_id = 4156;
DELETE FROM "Show" WHERE _id = 4156;
DELETE FROM "Movie" WHERE _id = 3384;
DELETE FROM "Subtitle" WHERE parent_id IN (SELECT _id FROM "Season" WHERE parent_id = 4156);
DELETE FROM "StreamRelation" WHERE parent_id = 4156;
DELETE FROM "StreamBlacklistRelation" WHERE media_item_id = 4156;
DELETE FROM "MediaItem" WHERE _id = 4156;
You can easily copy and paste this format! 😊
# 📚 SQLite Guide: Installation, Checking, and Deleting Records

## 1. Install SQLite 🛠️

To get started with SQLite, you'll need to install it on your system. Follow these steps:

### For Debian/Ubuntu:

1. **Open Terminal** 🖥️
2. **Update Package List**:
   ```bash
   sudo apt update
sudo apt install sqlite3
sqlite3 --version
Once SQLite is installed, you can open your database file:
cd ~/appdata/arrr/jellyseerr/db
sqlite3 db.sqlite3
Before deleting any records, it’s good practice to check if they exist.
SELECT media_request.id
FROM media
LEFT JOIN media_request ON media.id = media_request.mediaId
WHERE media.status = 5;
media_request records that are linked to media entries with a status of 5.1
3
5
7
8
9
10
11
14
15
28
If you confirmed that records exist, you can proceed to delete them.
DELETE FROM media_request
WHERE id IN (
    SELECT media_request.id
    FROM media
    LEFT JOIN media_request ON media.id = media_request.mediaId
    WHERE media.status = 5
);
After deleting, it’s important to verify that the records have been removed.
SELECT media_request.id
FROM media
LEFT JOIN media_request ON media.id = media_request.mediaId
WHERE media.status = 5;
You have successfully installed SQLite, checked for existing records, and deleted them as needed. If you have more questions or need further assistance, feel free to ask!